 Please subscribe here


|
3 EASY STEPS FOR ARC WELDING ***SMAW***
*** STEP 1 ***(Arc welding steps SMAW) Set up the material you will be using to be welded. Make sure the electrode holder is not touching the workpiece or worktable. Attach the workcable clamp to the table (inset)or workpiece. Turn the machine on. Adjust the range switch for the desired amperage. Wearing leather gloves, place an electrode in the electrode holder. Position the electrode over the area to be tacked, flip down your helmet, and tap or scratch the electrode on the area to be tacked to strike an arc. After making your tack welds, remove the electrode from the electrode holder. Check to see if the tacked pieces are alligned properly. If not, use a hammer to break them free, then retack them again. Chip the slag from the tack welds with a chipping hammer so that it doesn't contaminate the final weld.
*** STEP 2 ***Replace the electrode in the electrode holder, and position the electrode over the left side of the area to be welded. Hold the electrode at a 10 to 20 degree angle to the right. Flip down your hood and scratch or tap to strike an arc. The distance between the metal and electrode should not exceed the thickness of the electrode bare wire diameter. Move slowly to the right until the weld is complete.
*** STEP 3 ***To remove slag, hold the workpiece with pliers at an angle and scrape or knock the slag with the flat blade of the chipping hammer. Wear safety glasses when chipping slag. 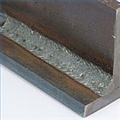
|
